In the event that your organisation’s section 18A certificate only requires one signature, you can go upload a global signature that will appear on all profiles. However, if multiple people can sign the certificate then you should leave the global signatory section blank and just upload a signature on your individual profile.
1. Profile Signature
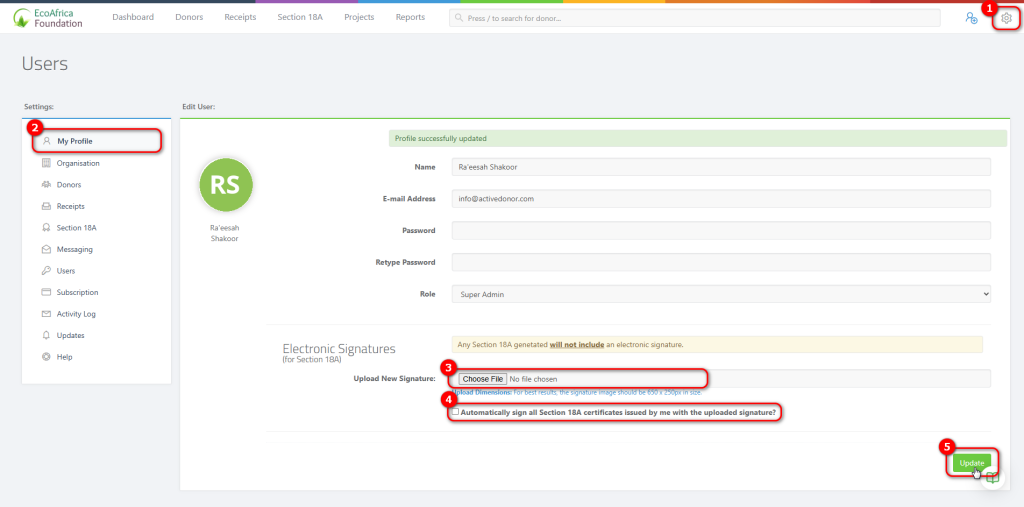
When uploading an electronic signature for your Section 18A Certificate go to your “My Profile” tab in your Settings section.
Click on the “Choose File” button in order to choose a signature file, make sure that it’s an image of type JPEG or PNG.
Remember to tick the box in order to automatically sign the Section 18A Certificates with your electronic signatures.

Save your changes by click the update button in the bottom right corner of your screen.
2. Global Signature
In your settings section go to “Section 18A” and click on “GLOBAL SIGNATORY”

When you are in this section, fill in the main signatory’s title and name, then upload an electronic signature. Remember to tick the box to automatically sign all section 18A certificates with the uploaded signature, then click to save.

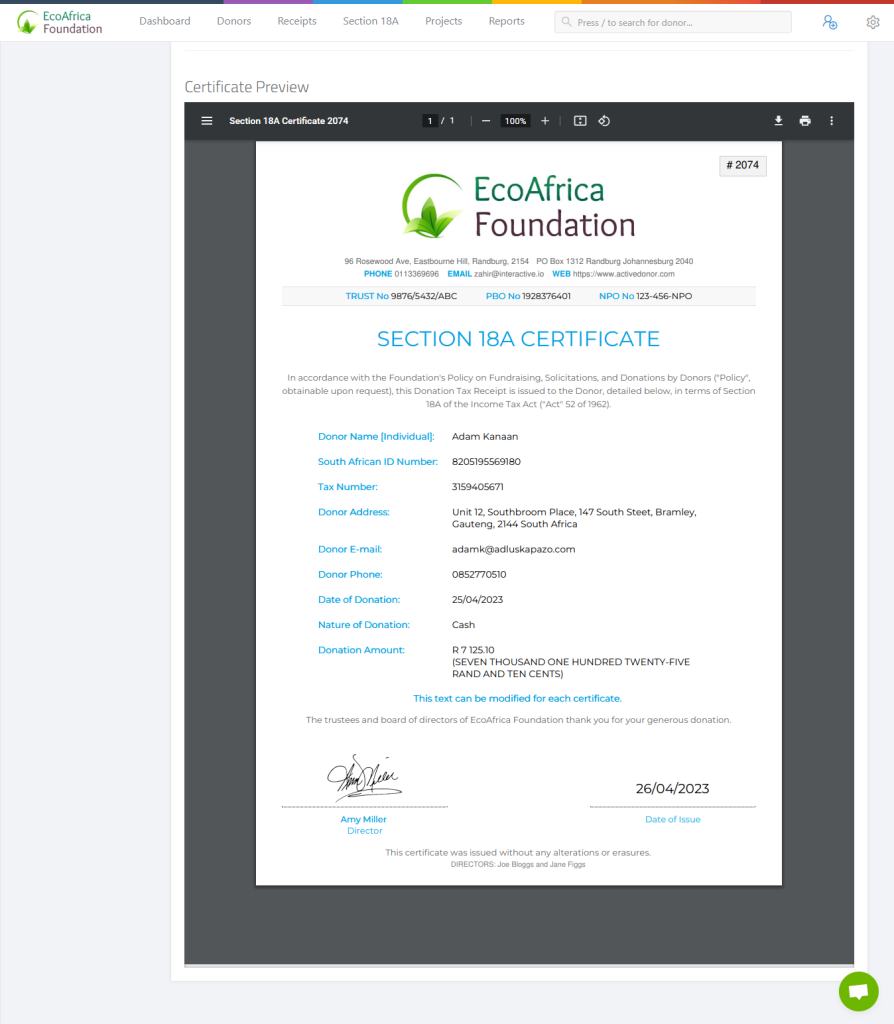
Once you have saved the settings you can now see that the new signatory’s details will be displayed on the certificate.

Video: How to Upload Your Electronic Signature on ActiveDonor
Generating an Image of Your Electronic Signature:
There are a number of options for generating electronic signatures:
- Generate a signature based on a font – visit: https://createmysignature.com to do so.
- Draw your signature on your device – visit: https://createmysignature.com to do so.
- Sign your signature on a piece of paper and scan it onto your device. See the video tutorial below: