To set up Newsletter Syncing you will need a Mailchimp account. You can sign up for a free Mailchimp account with the link below.
- Set up your Mailchimp account
- Sync your ActiveDonor database with Mailchimp
- Getting your API Key
- Getting your Audience ID & Audience Name
1. Set up your Mailchimp account
Clink here to set up your Mailchimp account.
Click here for a step-by-step guide on how to create a Mailchimp account.
2. Sync your ActiveDonor database with Mailchimp
Click on “Settings” in the top right corner.
In your settings section go to “Messaging” and select the “Newsletter Sync” tab.
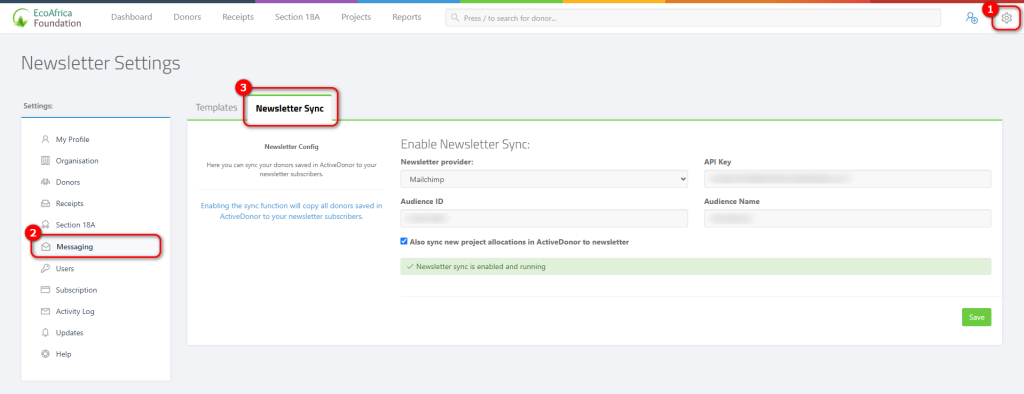
Click on “Newsletter provider” and select “Mailchimp”

3. Getting your API Key
To get your API Key you need to go to your Mailchimp account.
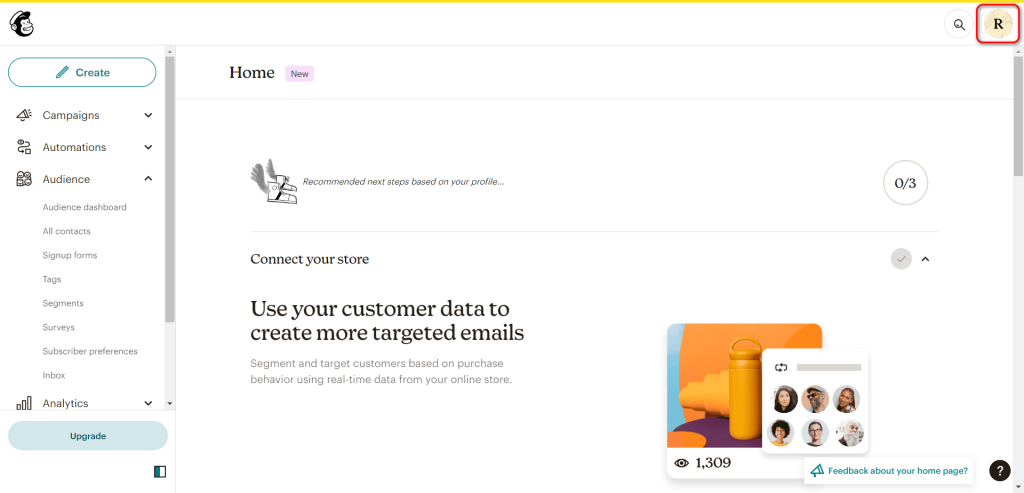
Click on your profile icon in the top right corner.
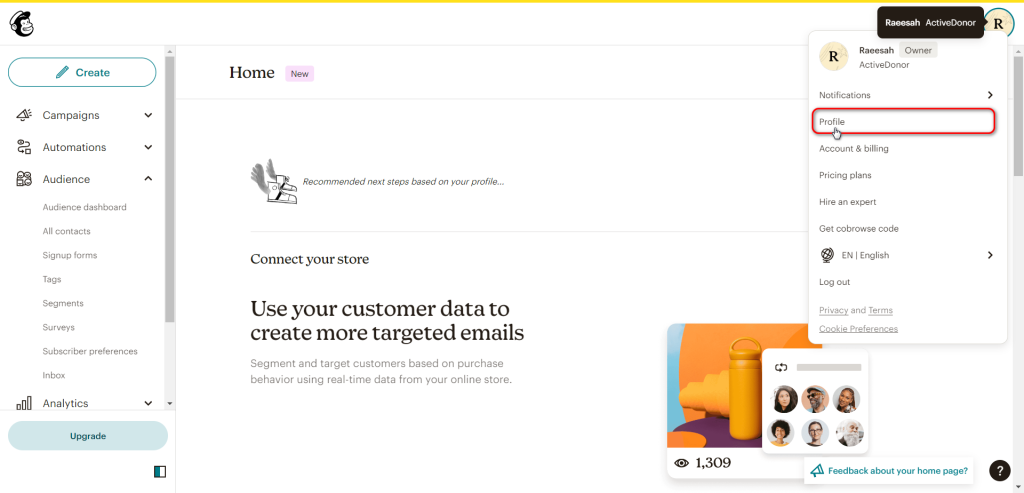
In the menu click on “Profile”
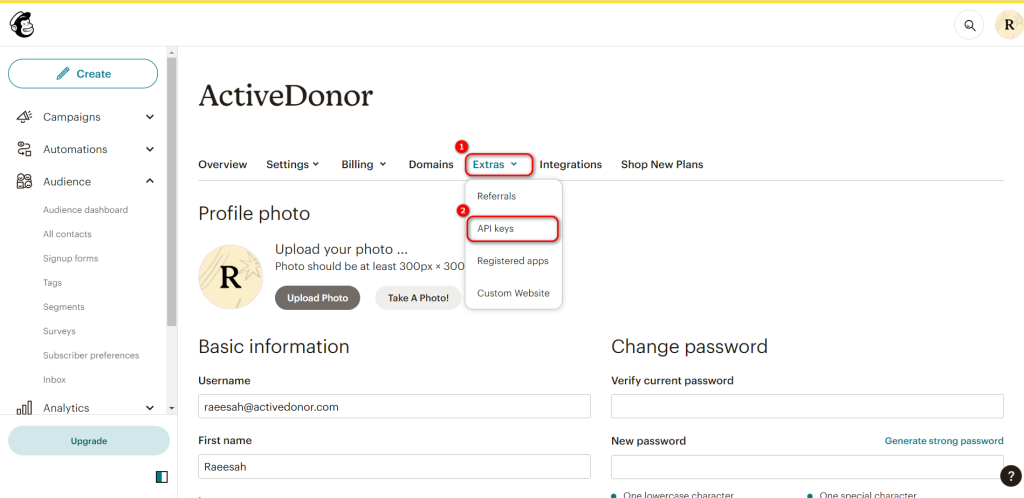
Once you are in your profile click on “Extras”
Next click on “API Keys”
Once you are on the API Key page click on “Create a Key”
Fill in a name for your API Key.
Then click on “Generate Key”
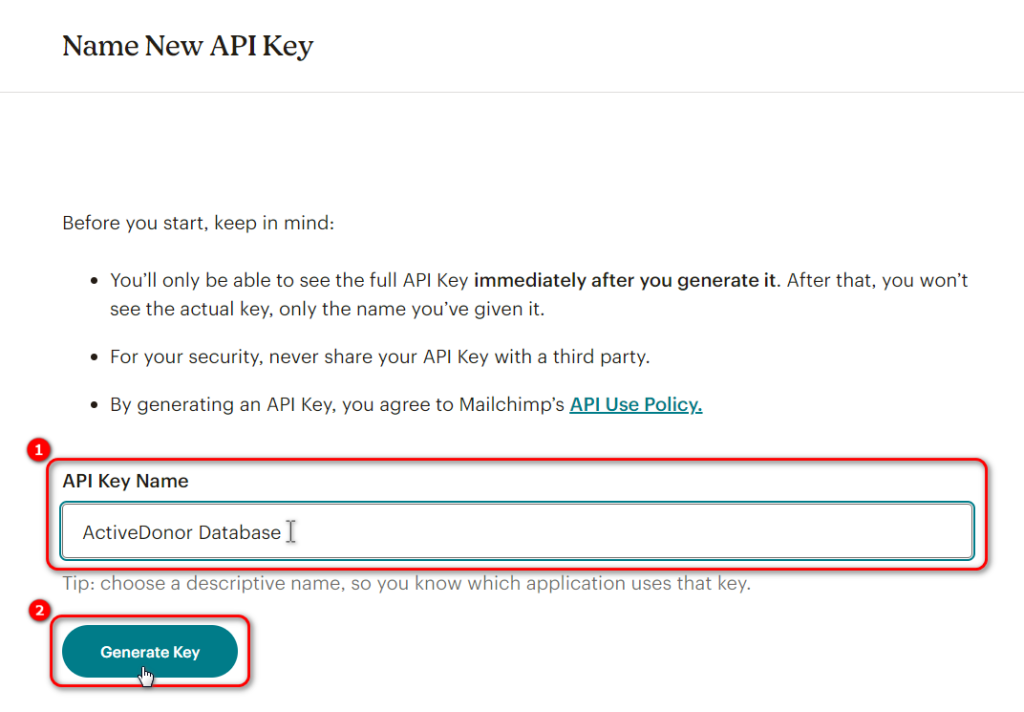
You will now see your API Key.
Click on “Copy to Clipboard”
Then click “Done”
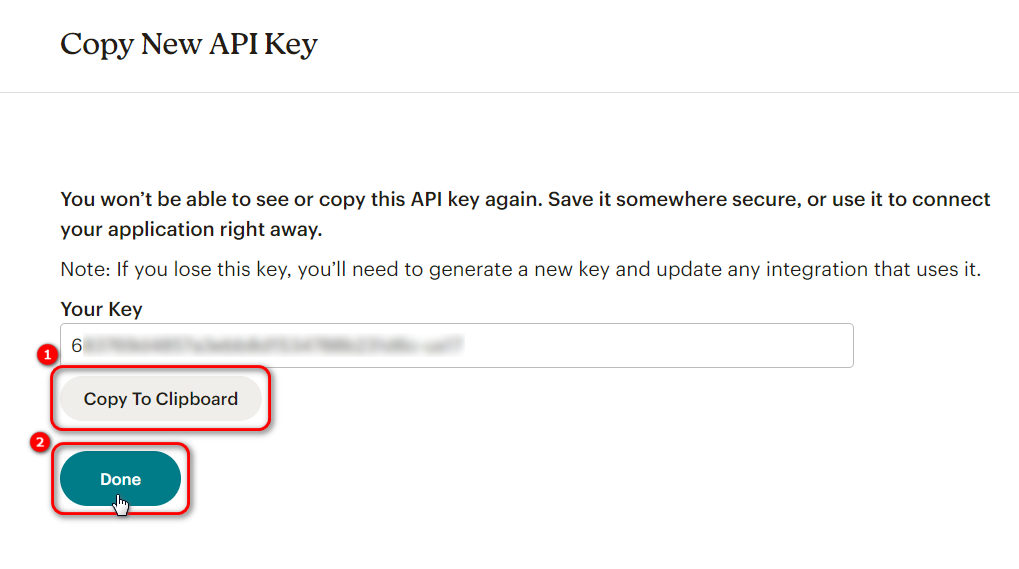
You can now head to your ActiveDonor profile and paste your API Key.

4. Getting your Audience ID & Audience Name
Head to your Mailchimp account to get your Audience ID.
Click on the “Audience” tab on the left.
Then click on “More Options” -> “Audience Settings”
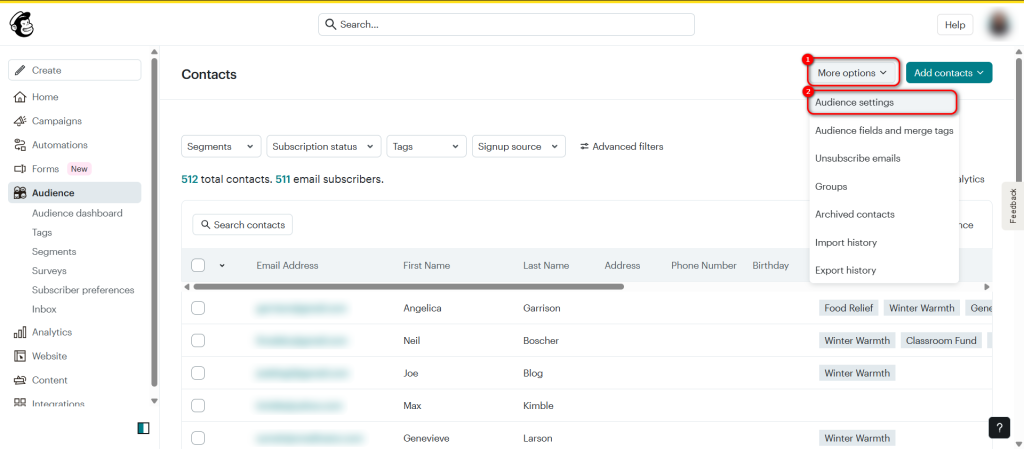
Here you will find your Audience ID & Audience Name
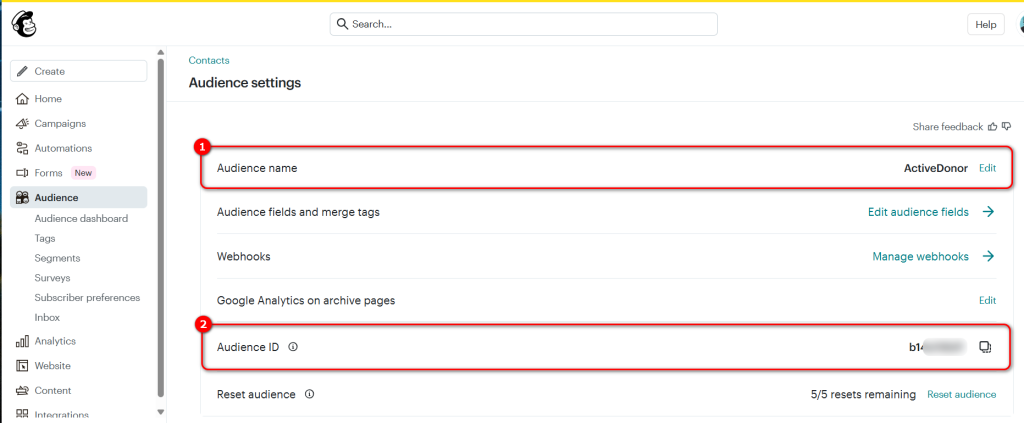
Select and copy your Audience ID (Labelled 2).
You can now head back to your ActiveDonor Profile and paste your Audience ID code.

Then head back to your Mailchimp account to get your Audience Name.
Select and copy your Audience Name (Labelled 1).
You can now head back to your ActiveDonor Profile and paste your Audience Name.

Once you are done pasting all of your information in, make sure to click “Also sync new project allocations in ActiveDonor to newsletter.”
Then click “Save”

Allow the system 24 hours to sync your donors and you’re all set!