Managing users
In short: Open Settings → Users → Users tab, click Add User, fill in the name, email, password and role, and click Save. You need the Manage Users permission, and adding a user counts against your plan's user limit. ActiveDonor does not email an invite — you set the password and share it with the person.
Overview
A user is a person who can sign in to your charity's ActiveDonor workspace with their own email address and password. Each user is given a role, which decides what they are allowed to do (see Roles and permissions — a role is a named group of permissions such as Super Admin or Fundraiser). This article covers adding, editing, deactivating (blocking), reactivating and deleting users. The number of users you can have is set by your subscription plan.
Before you start
You'll need:
- The Manage Users permission. Without it, the Users page and the user actions below are not available to you, and the Users item does not appear in the Settings menu.
- At least one role already set up, because every user must be assigned a role. New workspaces start with two roles, Super Admin and Fundraiser.
- Room within your plan's user limit. Adding a user counts against that limit; if you are already at it, the Add User form is replaced by an upgrade prompt (see Common issues & solutions).
To open the Users page: in the top navigation bar, open the gear / cog dropdown, choose Settings, then select Users in the Settings left-hand menu. The Users page has two tabs at the top: Users and Roles.
📌 Note: There is no email invitation. When you add a user you set their password yourself, and the user signs in with the email and password you chose. If someone says "I added a user but they didn't get an invite" — that is expected; send them the login details yourself.
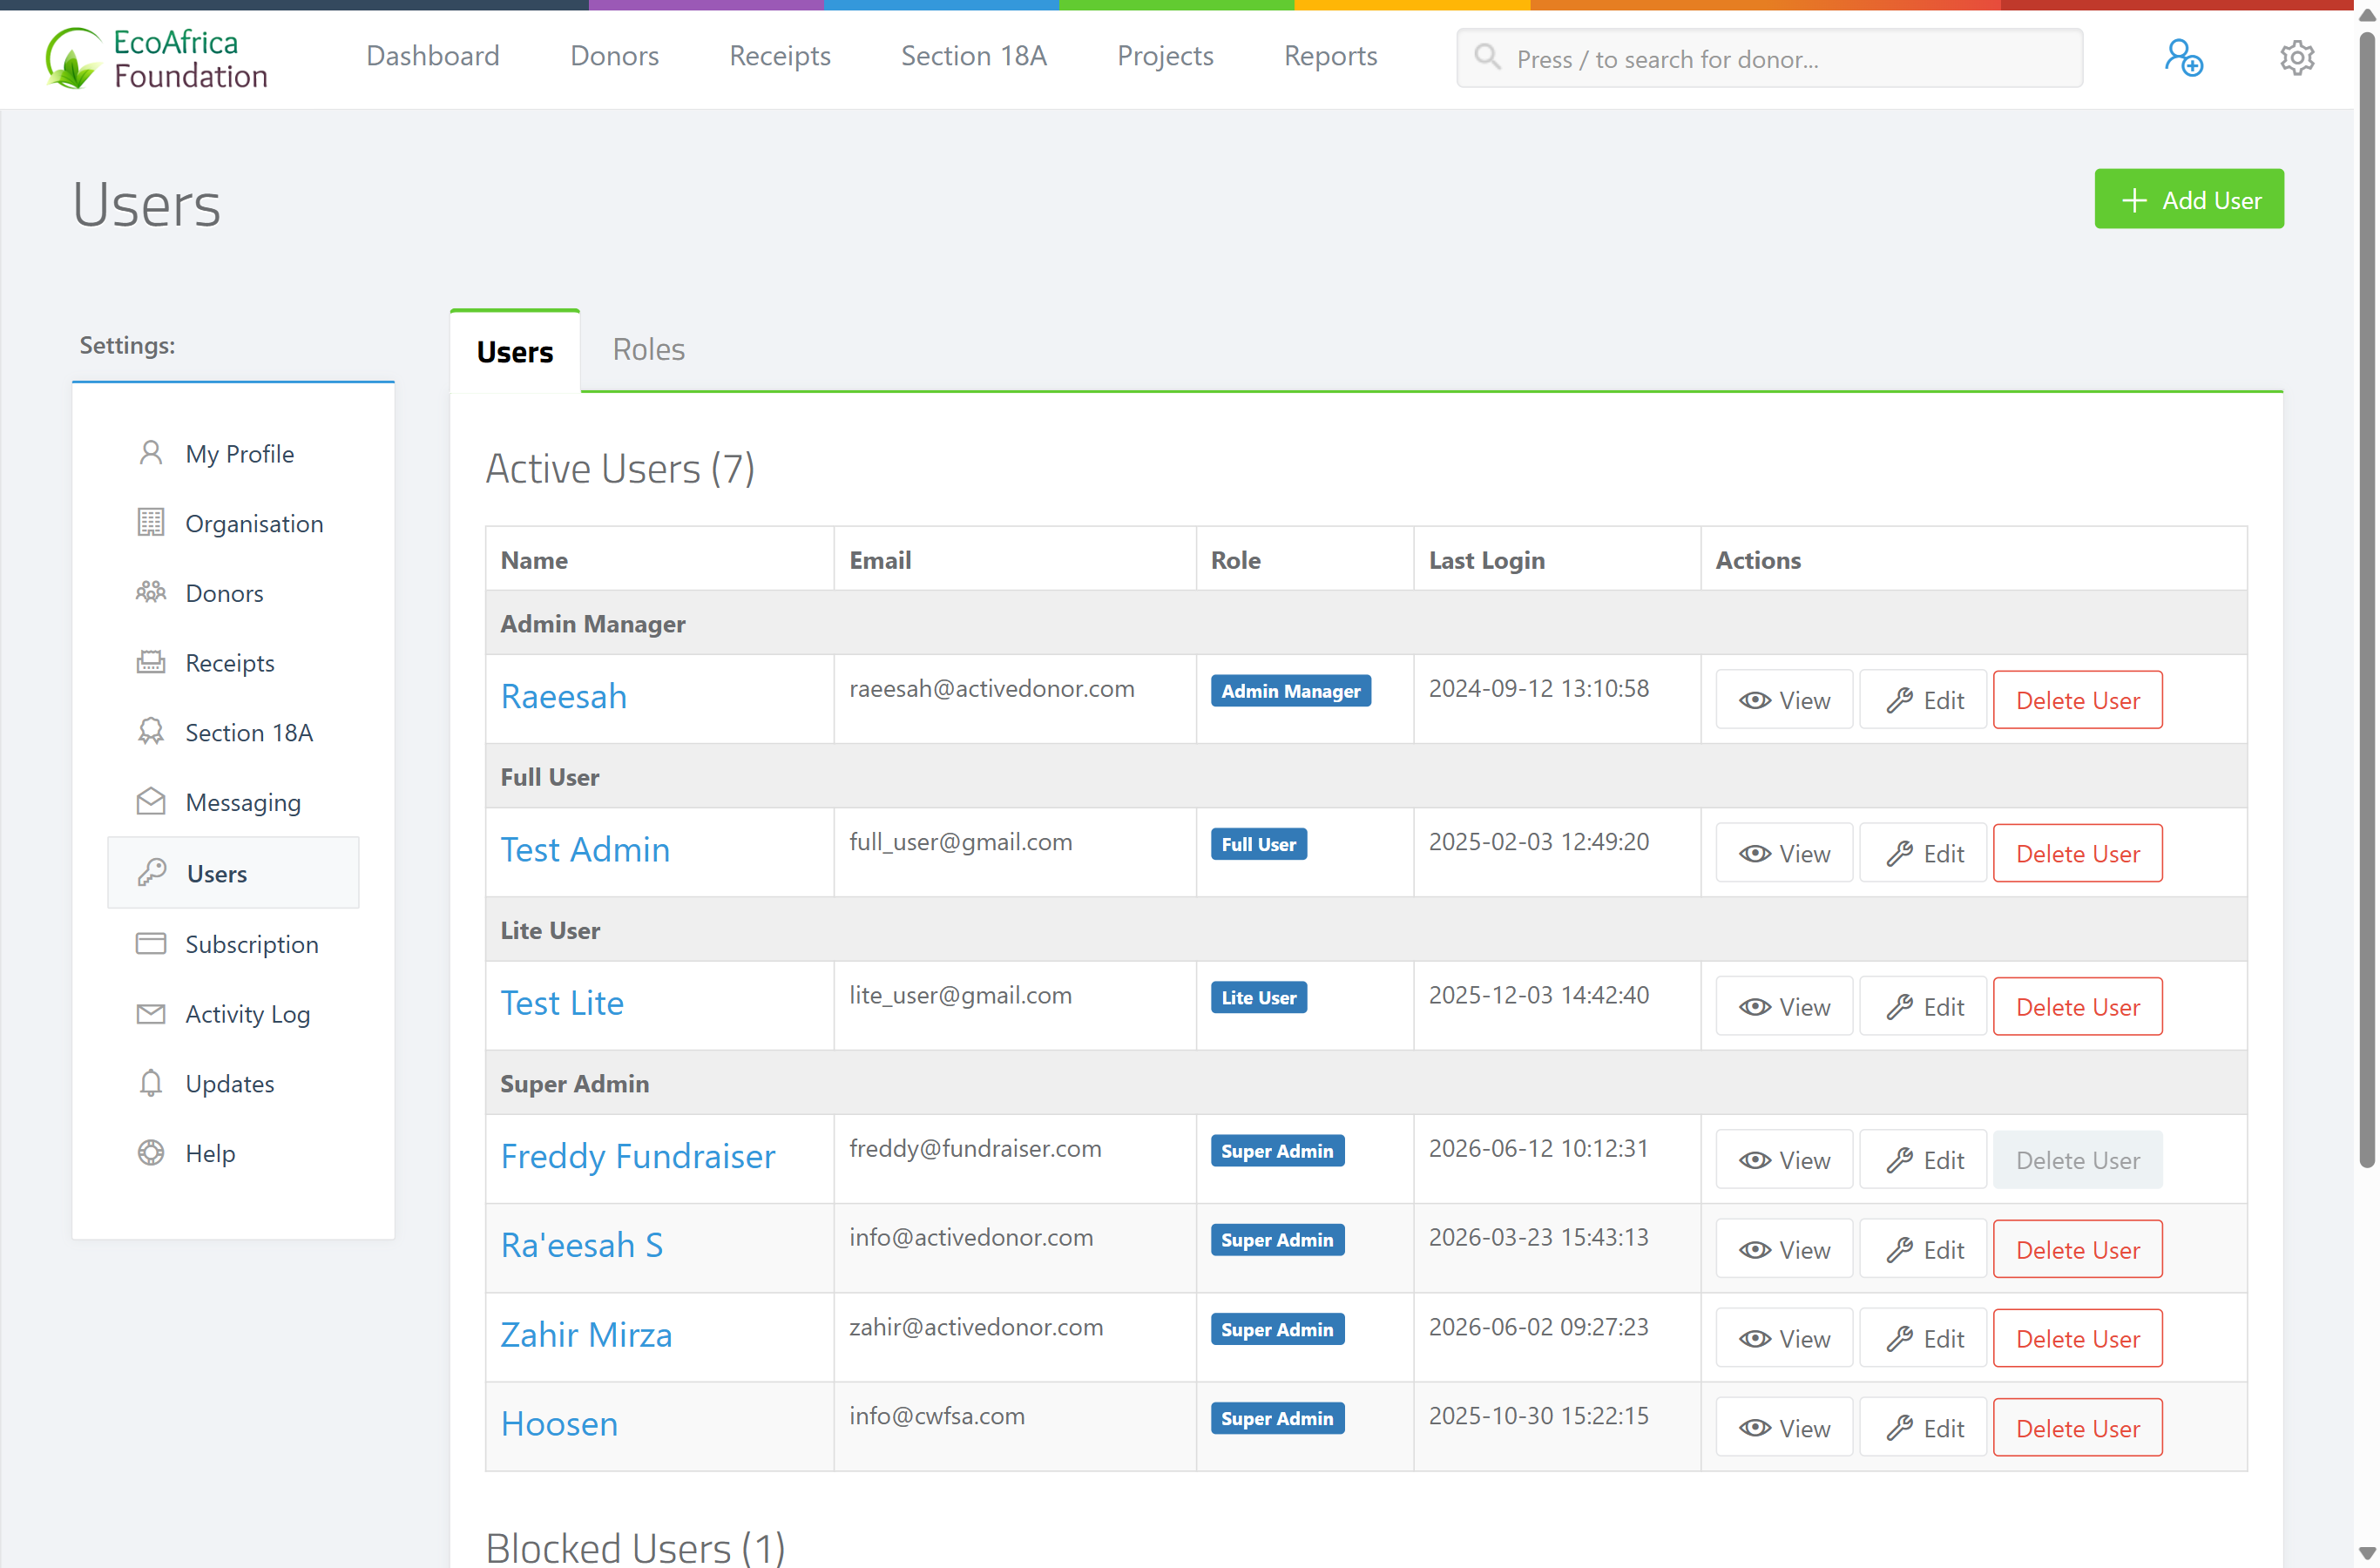
The Users list
The Users page lists everyone in your workspace, grouped by role and split into two tables:
- 🟢 Active Users — users who can currently sign in. The heading shows the count, for example "Active Users (4)".
- 🔴 Blocked Users — users who have been deactivated. Their names are shown with a strikethrough and a red BLOCKED label.
For each user the table shows Name, Email, Role (shown as a blue label), Last Login and Actions. The panel footer shows a running total, for example "Total user count : 5 (4 active, 1 blocked)". The action buttons are View, Edit and Delete User. You cannot delete your own account — for your own row the Delete User button is greyed out.
Adding a user
Step 1: Open the Add User form
On the Users page, select the Users tab, then click the green Add User button (top right).
Step 2: Complete the form
Complete the Add User form:
- Name — the person's full name (required).
- E-mail Address — the email they will sign in with; it must be unique in your workspace (required).
- Password — at least 6 characters (required).
- Re-type Password — must match the password above (required).
- Role — choose one role from the dropdown (required). The roles available are the ones set up on the Roles tab.
Step 3: Save
Click Save. You return to the Users page with the confirmation "User successfully saved", and the new user appears under their role in the Active Users table.
The new user can now sign in at your charity's ActiveDonor address using the email and password you set, then change their own password from their profile.
💡 Tip: To connect a new fundraiser, add them as a user and choose the Fundraiser role. By default the Fundraiser role can add and manage donors and receipts (and issue certificates) but cannot manage users, billing or settings — see Roles and permissions for the exact permission list.
Editing a user
Step 1: Open the Edit User page
On the Users page, find the user and click Edit on their row.
Step 2: Change the details
On the Edit User page you can change the Name, E-mail Address and Role, and set a new Password (and Retype Password) if you want to reset it. Leave the password fields blank to keep the current password.
Step 3: Update
Click Update. The confirmation "Profile successfully updated" is shown.
Changing a user's email or password signs that user out of any connected mobile-app sessions (their saved login tokens are cleared), so they will need to sign in again.
📌 Note: A user editing their own profile (including their email, password and electronic signature for Section 18A certificates) does so through the My Account profile page, not through the Users list. See Editing your profile (My Account) — the self-service page where a user updates their own name, password and signature.
Deactivating (blocking) and reactivating a user
Instead of deleting someone who has left, you can deactivate their account so they can no longer sign in but their history (including any receipts they issued) is kept.
Step 1: Block the user
On the Users page, click Edit on the user's row, tick the checkbox Deactivate account and prevent user from logging in, then click Update. The user moves to the Blocked Users table and is shown with a 🔴 BLOCKED label and the date they were blocked.
Step 2: Reactivate when needed
To reactivate, open the blocked user's Edit page, untick the same checkbox, and click Update. They move back to the Active Users table.
You cannot deactivate your own account — the deactivate checkbox only appears when you are editing someone other than yourself.
⚠️ Important: Reactivating a blocked user counts as adding an active user. If you are already at your plan's user limit, reactivation is blocked with the message "You have reached the maximum number of users. Please upgrade to add more users."
Deleting a user
Deleting removes the user permanently. Prefer deactivating (above) if the person issued receipts.
Step 1: Delete
On the Users page, click Delete User on the user's row.
Step 2: Confirm
Confirm the deletion in the prompt. On success the message "{name} has been deleted." is shown.
A user cannot be deleted if:
- It is your own account — "Deleting yourself isnt the best move at this point...".
- The user has issued any receipts — "Cannot delete user that has issued receipts. Deactivate the user instead." In this case, deactivate the user instead so the receipt history is preserved.
What this does not do
- Adding a user does not send any invitation or welcome email. You set the password and share the login details yourself.
- Deleting a user does not remove the receipts they issued — a user who has issued receipts cannot be deleted at all; deactivate them instead.
- The Users page manages only sign-in accounts. It does not set what each account can do — that comes from the user's role (see Roles and permissions).
Field reference
| Field | Required | Notes |
|---|---|---|
| Name | Yes | Up to 255 characters. |
| E-mail Address | Yes | Must be a valid email and unique among your workspace's users. |
| Password | Yes when adding a new user | Minimum 6 characters. When editing, leave blank to keep the existing password. |
| Re-type Password | Yes when a password is set | Must match Password exactly. |
| Role | Yes (when adding another user) | One role per user, chosen from your existing roles. |
Common issues & solutions
| What you see | What it means | How to fix it |
|---|---|---|
| The Add User form is replaced by an Upgrade Now message: "Your ActiveDonor plan allows for {n} users and you're currently at {n} users." | You have reached the maximum number of users allowed by your plan. | Click Upgrade Now to go to the Subscription page and move to a larger plan, or deactivate/delete a user you no longer need. See Your subscription and plan. |
| "You have reached the maximum number of users. Please upgrade to add more users." | Shown when you try to reactivate a blocked user but are already at your active-user limit. | Upgrade your plan or remove another active user first. |
| "Cannot delete user that has issued receipts. Deactivate the user instead." | The user issued receipts, so the account can't be deleted without losing that link. | Open Edit and tick Deactivate account and prevent user from logging in instead of deleting. |
| "Deleting yourself isnt the best move at this point..." | You tried to delete your own account. | You cannot delete yourself. Ask another Super Admin to remove your account if needed. |
| You don't see the Users menu item. | You don't have the Manage Users permission. | Ask a Super Admin to grant you the Manage Users permission. See Roles and permissions. |
| A new user says they got no invite email. | This is expected — ActiveDonor sends no invite. | Send the person the email address and password you set so they can sign in. They can change the password from My Account. |
FAQ
How do I add a new user? Open Settings → Users → Users tab, click Add User, fill in the name, email, a password (at least 6 characters), re-type it, pick a role, and click Save.
Can a Super Admin add a user? Yes. Any user with the Manage Users permission can add users, and Super Admin has every permission.
I can't see the Add User button (or the Users menu). You need the Manage Users permission. Ask a Super Admin to grant it.
I added a user but they didn't get an invite — what went wrong? Nothing. ActiveDonor doesn't email an invitation — you set the user's password when you add them, so send them the email and password to sign in. See I added a user but they didn't get an email invite — how do they log in?.
How do I connect a new fundraiser? Add them as a user (Settings → Users → Add User) and choose the Fundraiser role.
How do I stop someone signing in without losing their receipt history? Deactivate (block) them: Edit the user, tick Deactivate account and prevent user from logging in, and Update. Their history is kept.
Why can't I delete a user? Either it's your own account, or the user has issued receipts. Deactivate the user instead so the receipts stay linked.
Why is the Add User form replaced by an Upgrade message? You've reached your plan's user limit. Upgrade your plan, or deactivate/delete a user you no longer need.
Related
- I added a user but they didn't get an email invite — how do they log in?
- Roles and permissions
- Your subscription and plan
- Editing your profile (My Account)
- Electronic signatures on certificates
- Granting ActiveDonor support access to your account
Need a hand?
If you're stuck adding or removing a user, contact ActiveDonor support with the person's name and email and we'll help.