Roles and permissions
In short: A permission is one thing a user is allowed to do (for example Manage Donors or Add Receipt); a role is a named group of permissions (for example Super Admin). Every user has one role. Manage roles under Settings → Users → Roles tab — you need the Manage Users permission. New workspaces start with Super Admin (every permission) and Fundraiser.
Overview
In ActiveDonor, what a user can see and do is decided by their role. A role is a named bundle of permissions, and each permission gates one capability (such as viewing donors, issuing certificates, or managing billing). You assign exactly one role to each user on the Users page (see Managing users). This article explains how to view, create, edit and delete roles, and how the advanced Permissions list works.
Before you start
You'll need:
- The Manage Users permission to view and manage roles (the Users page and its Roles tab). If you don't have it, you won't see the Users menu item at all — there is no separate "Roles" button outside that page.
- The separate Manage Permissions permission to view and manage the Permissions list. Most charities never need this — the built-in permissions cover everything.
New workspaces are created with two roles already set up: Super Admin (which has every permission) and Fundraiser (a limited day-to-day role for capturing donors and receipts).
📌 Note: There is no standalone "Roles" page in the main menu. Roles live on the Roles tab of the Users page, reached via Settings → Users. If you can't get there, you're missing the Manage Users permission.
The full list of permissions
These are the permissions that exist in a workspace by default. Each is the name of a capability you can include in a role:
- Add Receipt — create receipts.
- Add Donor — add new donors.
- Manage Donors — view and edit donors.
- Manage Receipts — view, edit and delete receipts.
- Manage Certificates — issue and manage Section 18A certificates.
- View Certificates — view Section 18A certificates (without full management).
- Manage Projects — manage projects and fundraising.
- View Reports — open the Reports section and run reports.
- Manage Settings — change organisation and other settings.
- Manage Users — manage users and roles (the Users page).
- Manage Roles — a separate permission for role management.
- Manage Billing — view and change the subscription, and pay invoices.
- Manage Permissions — manage the Permissions list itself (advanced).
- Mobile App — sign in to the ActiveDonor Android mobile app.
💡 Tip — a role that can't see donation amounts: There is no permission that hides donation amounts on its own. Receipts (and their amounts) are gated by the receipt permissions: a role without Manage Receipts and Add Receipt can't open the receipts area, so it won't see receipt amounts there. But amounts still appear in other places a user can reach — for example reports (gated by View Reports) and the donor's own page. To keep a user away from amounts, leave out Manage Receipts, Add Receipt and View Reports. If you need a true "amounts hidden" role, contact ActiveDonor support — it isn't a single switch today.
Restricted permissions
Two permissions are treated as restricted: Manage Charities and Manage Permissions. When you build or edit a role, these two only appear in the Allowed Permissions picker if you yourself already hold them. This stops a user from granting capabilities they do not have. (Manage Charities is a reseller/multi-charity capability and is not present in a normal single-charity workspace.)
Viewing your roles
Step 1: Open the Users page
In the top navigation bar, open the gear / cog dropdown, choose Settings, then select Users.
Step 2: Open the Roles tab
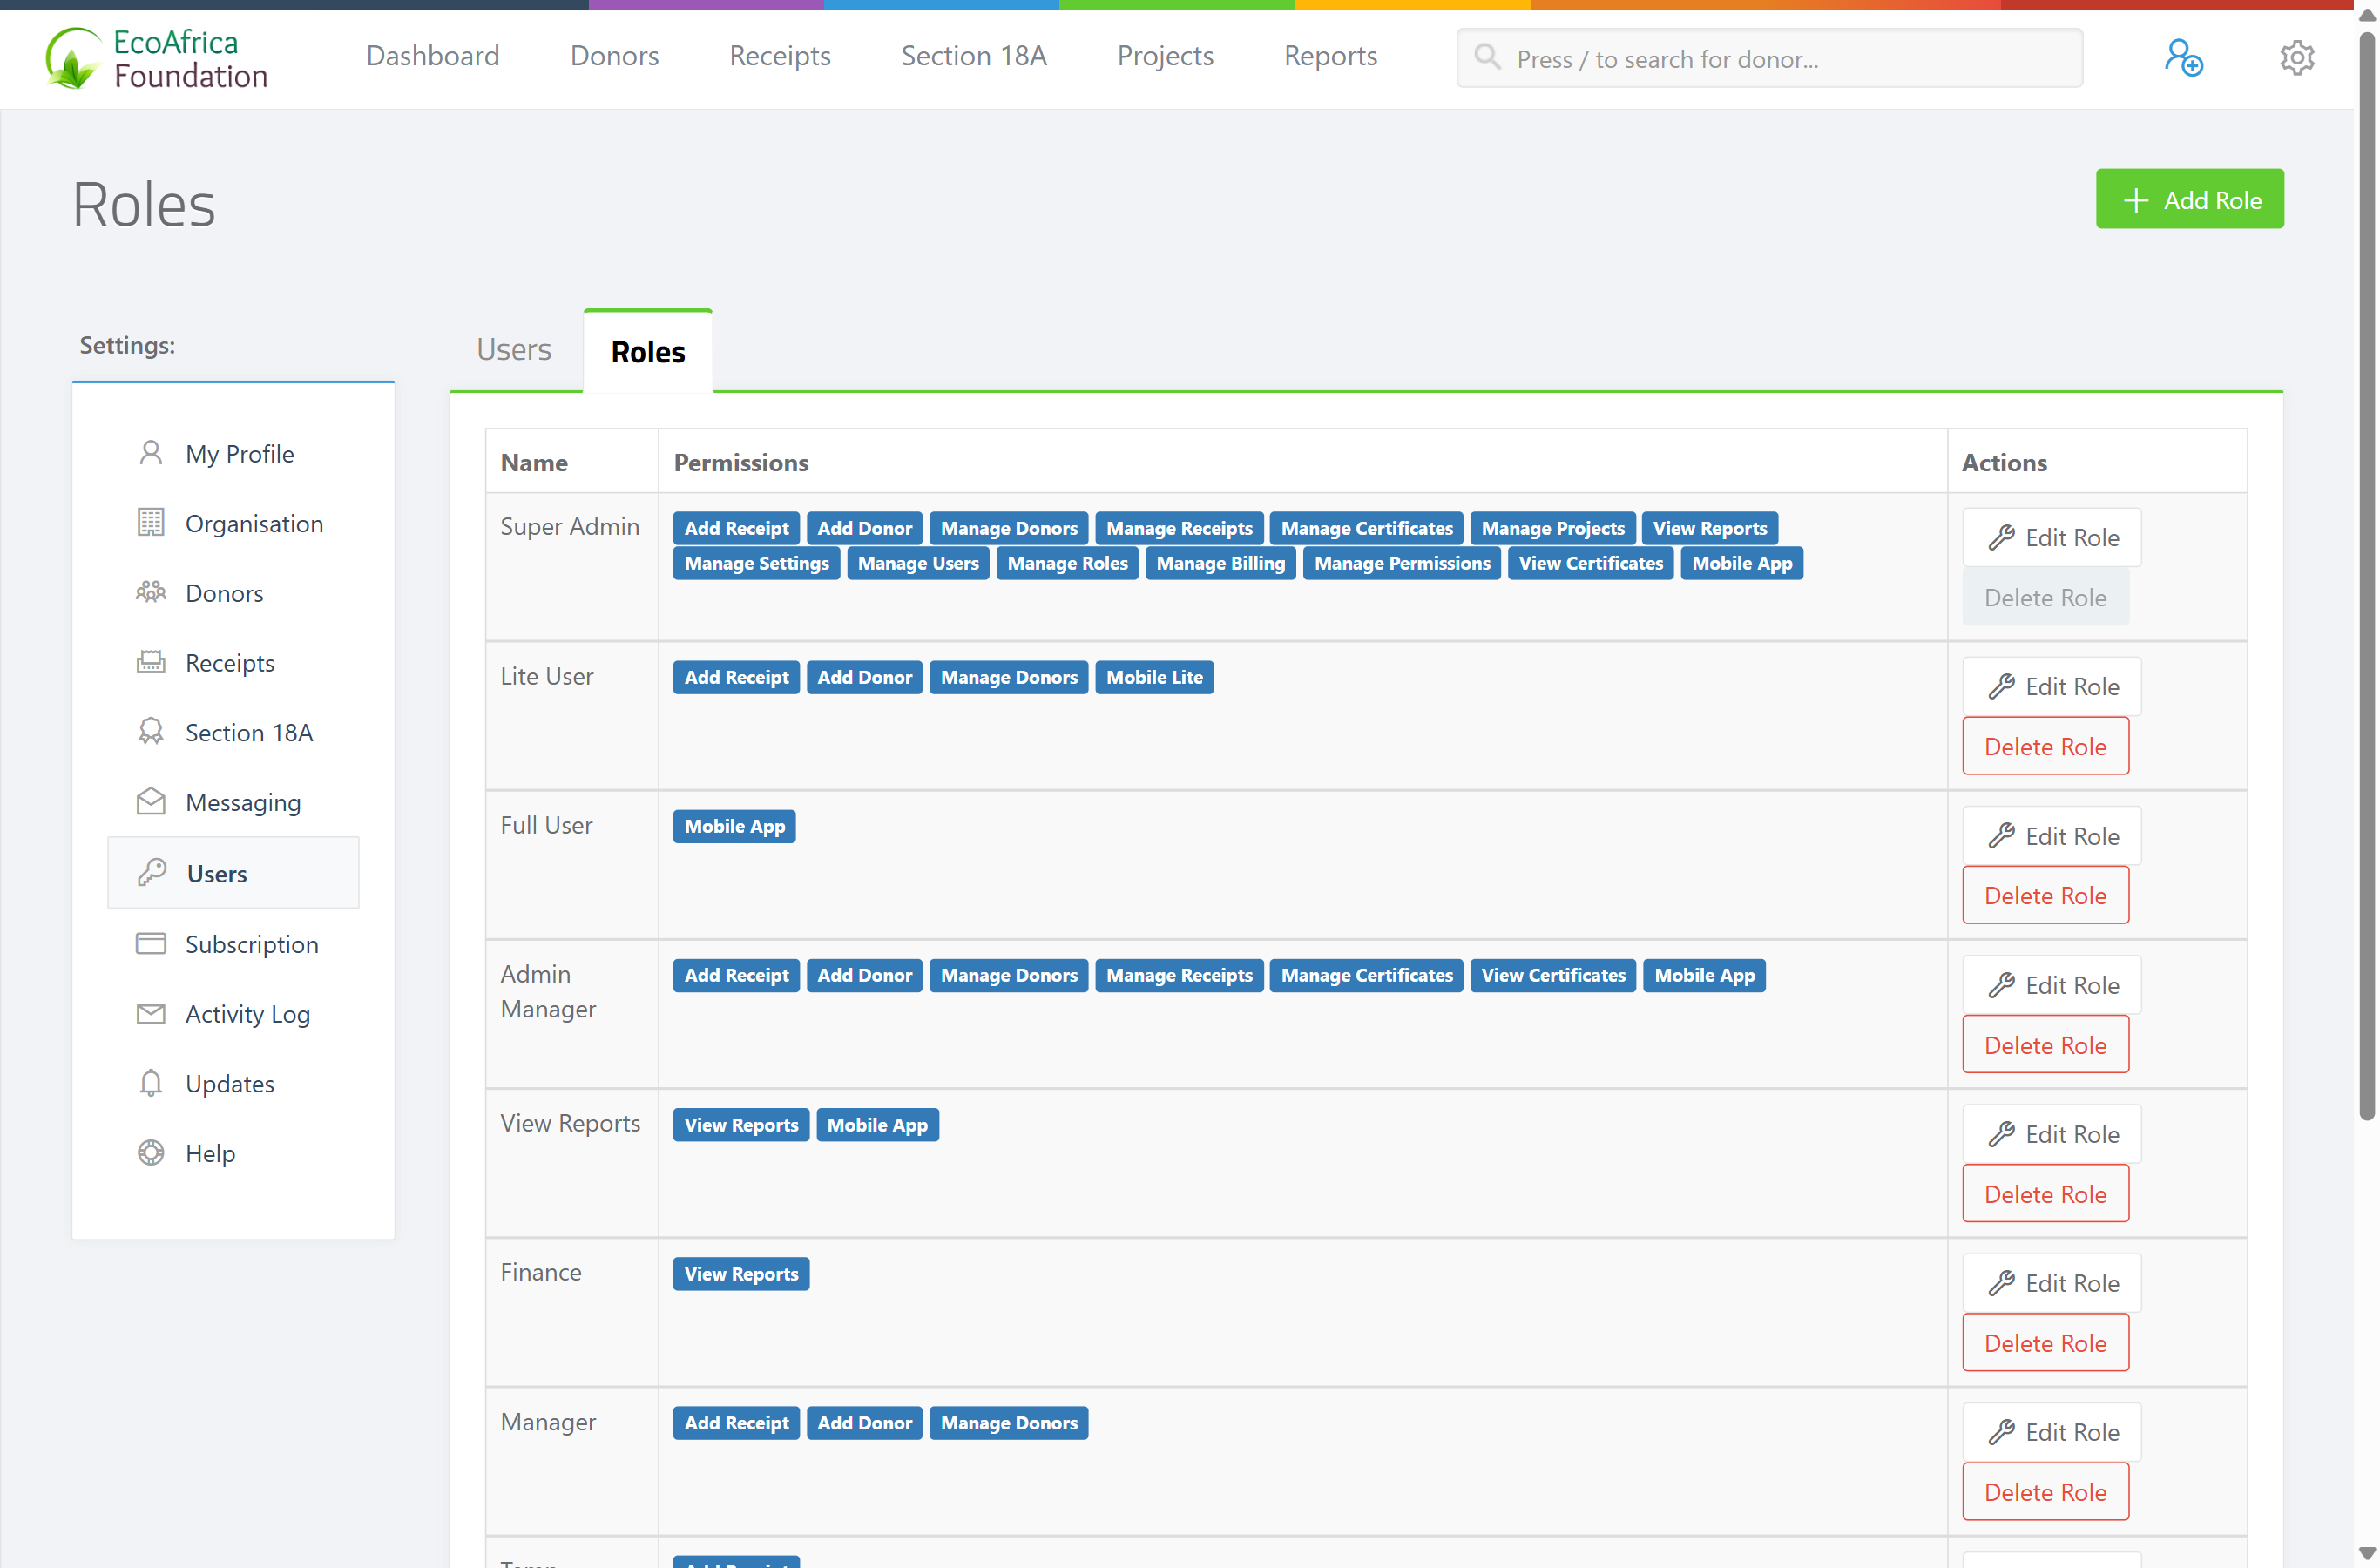
Click the Roles tab at the top of the page. The Roles table lists each role's Name, its Permissions (shown as blue labels) and the Actions (Edit Role, Delete Role).
Creating a role
Step 1: Open the Add Role form
On the Users page, open the Roles tab and click the green Add Role button (top right).
Step 2: Name it and pick permissions
On the Add Role form:
- Name — a name for the role (required, must be unique).
- Allowed Permissions — a multi-select box. Click it and choose every permission this role should have (at least one is required).
Step 3: Add
Click Add. You return to the Roles list with the confirmation "Role successfully added".
Editing a role
Step 1: Open the role
On the Roles tab, click Edit Role on the role's row.
Step 2: Change the name or permissions
Change the Name and/or adjust the selected permissions in the Allowed Permissions box.
Step 3: Update
Click Update. The confirmation "Role successfully updated" is shown.
When you save a role's permissions, the role's existing permissions are fully replaced by the new selection. Editing a role also signs the role's users out of any connected mobile-app sessions (their saved login tokens are cleared), so changes take effect cleanly the next time they sign in.
Deleting a role
Step 1: Delete
On the Roles tab, click Delete Role on the role's row and confirm.
Step 2: Confirm
On success the message "Role {name} has been deleted." is shown.
A role cannot be deleted if:
- It is assigned to one or more users — "Cannot delete role that is assigned to users." Reassign those users to a different role first (edit each user and change their Role).
- It is your own role — "Deleting your role isnt the best move at this point...". For your own role, the Delete Role button is greyed out.
Managing the Permissions list (advanced)
The Permissions list lets you create brand-new permission names. This is rarely needed: the built-in permissions (listed above) already gate every feature, and creating a new permission has no effect unless the application code checks for it. You need the Manage Permissions permission to use this page.
- View — go to the Permissions page (it lists every permission's Name with Edit and Delete actions). It is reached at the
/permissionsaddress; it is not in the standard Settings menu. - Add — click Add Permission, enter a unique Name, and click Add. Confirmation: "Permission successfully added".
- Edit — click Edit, change the Name, and save. Confirmation: "Permission successfully updated".
- Delete — click Delete on the permission's row. Confirmation: "Permission has been successfully deleted."
What this does not do
- A role does not control sign-in by itself — a user must also have an active account (see Managing users).
- There is no built-in permission that masks or hides donation amounts while still allowing other access. The closest is leaving out the receipt and report permissions (see the tip above).
- Adding a new permission name on the Permissions page does not create a new feature; it only adds a label that has no effect unless the system already checks for it.
Field reference
| Form | Field | Required | Notes |
|---|---|---|---|
| Add / Edit Role | Name | Yes | Up to 255 characters; must be unique. |
| Add / Edit Role | Allowed Permissions | Yes | At least one permission must be selected. Manage Charities and Manage Permissions only appear if you already hold them. |
| Add / Edit Permission | Name | Yes | Up to 255 characters; must be unique. |
Common issues & solutions
| What you see | What it means | How to fix it |
|---|---|---|
| There's no Roles button / you can't reach roles. | Roles live on the Roles tab of the Users page, and you need Manage Users to see it. | Open Settings → Users → Roles tab. If the Users menu item is missing, ask a Super Admin to grant you Manage Users. |
| A permission you expected is missing from the role picker. | Manage Charities and Manage Permissions only appear if you already hold them. | Ask a user who has those permissions to add them to the role. |
| "Cannot delete role that is assigned to users." | The role is still assigned to at least one user. | Move the affected users to another role (edit each user's Role), then delete the role. |
| "Deleting your role isnt the best move at this point..." | You tried to delete the role you yourself are on. | Switch yourself to another role first, or ask another admin. |
| A user still can't access a feature after you changed their role. | Permission changes clear connected mobile-app sessions and take effect on next sign-in. | Ask the user to sign out and back in. Confirm they're on the intended role on the Users tab. |
| You can't see donation amounts hidden for a role. | No single permission hides amounts. | Remove Manage Receipts, Add Receipt and View Reports from the role; contact support if you need a stricter setup. |
FAQ
How do I change permission settings for a user? You don't change permissions on the user — you change their role, or edit the role's permissions. Go to Settings → Users → Roles, edit the role, and adjust the Allowed Permissions.
There is no Roles button — where are roles? On the Roles tab of the Users page (Settings → Users → Roles). You need the Manage Users permission to see it.
Can I make a role that can't see donation amounts? Not with one switch. Leave Manage Receipts, Add Receipt and View Reports out of the role so the user can't open the places amounts appear. There is no dedicated "hide amounts" permission today.
What can the Fundraiser role do? By default it's a limited day-to-day role for capturing donors and receipts (add/manage donors, add/manage receipts, and issue certificates). It cannot manage users, billing or settings. You can edit it like any role.
What does Super Admin include? Every permission in the workspace.
Why didn't my permission change take effect? Changes apply on the user's next sign-in and clear mobile-app sessions. Ask the user to sign out and back in.
Related
- Managing users
- Editing your profile (My Account)
- Your subscription and plan
- Granting ActiveDonor support access to your account
Need a hand?
If you're unsure which permissions a role needs, contact ActiveDonor support and tell us what the person should be able to do — we'll suggest the right set.